There is nothing quite like the frigid winds of winter to make us dream of warmer days spent in the fresh air. Once the spring thaw arrives, we never want to go back inside. Evening meals enjoyed al fresco help stretch those warm days of summer, so perhaps it’s time to start planning your new outdoor kitchen.
Outdoor kitchens add both function and beauty to your outdoor space. While a typical indoor kitchen remodel costs $22,000 on average, an outdoor kitchen averages around $12,000, making it a much more budget friendly update. Return on investment when it comes time to sell your home varies a great deal when it comes to outdoor kitchens. Homes in warmer locales in the southern half of the United States have a higher return than those in colder climates. Choices of location, layout, materials and amenities will obviously have an enormous impact on cost, so understanding the options before you begin planning is helpful.

Step 1: Identify the Location
The very first decision you will need to make in regards to your outdoor kitchen is where you want to place it. Those with large yards may have several options while those on smaller plots of land will have more limited choices. Keep in mind the following considerations:
Near Your Indoor Kitchen
If you are planning a smaller, more basic kitchen with only a grill and prep space, site your project near your indoor kitchen. The ability to easily carry pre-prepped food and utensils back and forth will be critical to ease of use as well as clean up.
Property Feature
You may desire your outdoor cooking area be located near another feature of your property like a pool, pond, or fire pit. If this feature is more than a few steps from your indoor kitchen, you will want to include more amenities like a sink, refrigerator, and ample storage for designated bowls and utensils to avoid tedious trips back and forth.
By Your Residence
The exterior walls of your home can provide excellent structure and shelter around which to design your outdoor kitchen. That said, the north or south sides of your house will be the coolest as they will avoid direct sunlight during the hottest part of the day. If the west side of your home is the most practical for outdoor kitchen placement, consider a roof or pergola to provide some shade.
Consider the Heat
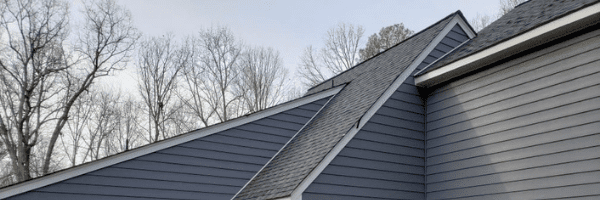
Another consideration when placing your outdoor kitchen directly adjacent to your house is the heat resistance of your home’s exterior. Be sure to consider the impact of outdoor cooking on your home’s structure. Vinyl siding and the high heat of a grill or pizza oven are not a good or safe combination.
Consider Landscaping
The overall landscape of your yard should also be accounted for in site planning. Will trees need to be removed? Is drainage sufficient? Will you need excavation to clear a space for your new outdoor focal point? If you are unsure about any of these factors, consult a landscape architect to help you make the most of your space without ending up with costly problems down the road.
We’ll discuss more about utilities shortly, but for the purposes of choosing the site of your outdoor kitchen, remember that the cost of running electric, plumbing, and gas to your project is generally calculated by the foot. Locating your kitchen farther away from your house will likely cost you more money.
Step 2: Choose a Layout
Once you have chosen the location of your new outdoor kitchen, it’s time to choose a layout. Designers of indoor kitchens generally refer to the “kitchen work triangle”. The three points of the triangle refer to the locations of the primary places in a kitchen where work takes place: the refrigerator, the sink, and the stove. Ideally, the distance between these items should be between four and nine feet with no obstacles in between to avoid wasted steps.
The basic principle of efficiency prescribed by the kitchen work triangle should be considered when planning a layout, but many outdoor kitchens won’t be large enough to follow these measurements. Still, functionality should reign supreme when designing your workspace. There are three basic layouts in outdoor kitchen design:
- Linear kitchens are similar to indoor kitchenettes and are often installed along a wall. Another option for a linear kitchen is a straight island design with a bar on one side and a grill and prep space on the other. They are ideal for for those with a conservative budget and for kitchens in which only one person will work at a time.
- L-shaped or peninsula shaped layouts are ideal for creating a “hot zone” where you will grill or smoke your food and a “cool zone” where you will chop and prep foods. These are also perfect for including a raised bar with stools on one side for guests to sit and chat with the grill master while being out of the way of heat and smoke.
- A large and all-inclusive outdoor kitchen may benefit most from a u-shaped layout that mimics most indoor kitchens. This layout has plenty of space for a grill, smoker, or pizza oven, under-counter refrigerator, sink, dishwasher and plenty of storage.
Check out these design ideas from one of our favorite brands – Belgard.
Step 3: Are Utilities Needed?
A traditional charcoal grill, wood smoker or gas grill operating from a small propane tank doesn’t need any utilities to operate. However, if you are upgrading from a grill on your deck to a true outdoor kitchen space, you will need access to utilities. Running lines for and installing utilities will require permitting, so you will need to consult the professionals for this part. That said, you must first determine which utilities you will require. As mentioned above, locating your outdoor kitchen a great distance from your home will require longer runs of all utilities, so your cost will be significantly impacted by location.
- Electricity is a no-brainer necessity for any outdoor kitchen. Task lighting is one of the most overlooked elements in outdoor kitchen design. A simple clip-on grill light will get the job done, but for a truly integrated al fresco cooking experience, you will need hardwired lighting. Additionally, if you intend to include a refrigerator or dishwasher in your kitchen, electricity is required. Your electrician should be sure to include GFCI (ground fault circuit interrupted) outlets which are required wherever water and electricity might come in contact. (Your electrician will inform you of any other local building codes.)
- Plumbing is not a necessity for the simplest of outdoor kitchens, but it is definitely convenient. A basic cold water sink for rinsing produce and handwashing is handy. A sink that runs hot water is an added luxury, but the pipes that run hot water will need winterization in any area that experiences temperatures below freezing. Additionally, the most high end outdoor kitchen might include an icemaker which requires a water source.
- If you live in a place where natural gas is available, a designated natural gas line for fueling a gas grill is a major convenience. How many times has your small propane tank run out of gas in the middle of grilling a meal? Hooking up to natural gas means that will never happen again. The cost of running a designated line of natural gas for your outdoor grill is around $500 plus the monthly cost of gas usage.
Step 4: Design and Choose Materials
Now that location, layout, and utilities are in place, you can begin choosing cabinetry, countertops, lighting and appliances. While the vast array of choices in each of these areas deserves its own article, remember that every element of an outdoor kitchen is going to be exposed to the elements. Rain, snow, ultraviolet rays from the sun, and wind will all impact your outdoor space.
- Storage cabinets should be constructed of stainless steel or stone for durability. Wood cabinets could potentially be used but only if very well covered and protected. An experienced outdoor kitchen designer and installer can advise you on this choice if you are unsure.
- The most popular materials for outdoor countertops are concrete, non-porous natural stone like limestone, or tile. While versatile and often functional, tile counters can be problematic in cold environments as the freeze/thaw cycle can cause the tiles to detach if not properly installed with a latex-based grout that allows for expansion.
- When choosing appliances for your outdoor kitchen, be diligent in selecting products specifically designed for outdoor use. In addition to being a safety hazard, products not designed to withstand the elements are likely to have their warranties voided if used outside.
An outdoor kitchen is an impressive and exciting addition to any home. While there are many choices to make throughout the designing and building process, a beautiful and functional final product will provide enjoyment to you and your guests for years to come. Explore the different patio and hardscape services we offer in Richmond, VA – and surrounding neighborhoods including Charlottesville, Hampton Roads and Williamsburg. Then contact us for a free estimate today!


